

ScheckEats Presents: Letters from Spain
ScheckEats Presents: Letters from Spain
An exclusive look at life abroad with practical guides, recipes and exploration. Will be free for the first two weeks, then some recipes and discussions will be available to paying subscribers only.

In this newsletter: how I decided on Madrid, hosting a happy hour on my terrace, and a recipe for key lime pie hamantaschen.
Letters from Spain is grounded in three series:
Escaping America
Will discuss all things living abroad. It’ll include practical information on the logistics of moving to another country and focus on differences between Spain and the United States.
Letters from…
Will explore diverse cultural topics like Spanish bar culture, restaurant and city guides, hosting, and the occasional recipe.
And, last but not least:
Grandma’s Recipe Box
I will unpack recipes from my grandma’s extensive archive and take submissions of your family recipes. We’ll see how these recipes hold up in a 2024 lens and what we change. I will also examine often store-bought items, such as cake mixes, Lipton onion soup, and more, and learn to make them from scratch.
The series will likely evolve and change as we go, but I have several months of ideas already :)
Escaping America
Here’s an idea of the topics I will cover in this section.
Preliminary Research and Decisions
Visa and Lawyers
Documents
Packing and Storage
Medication
Housing and Banking
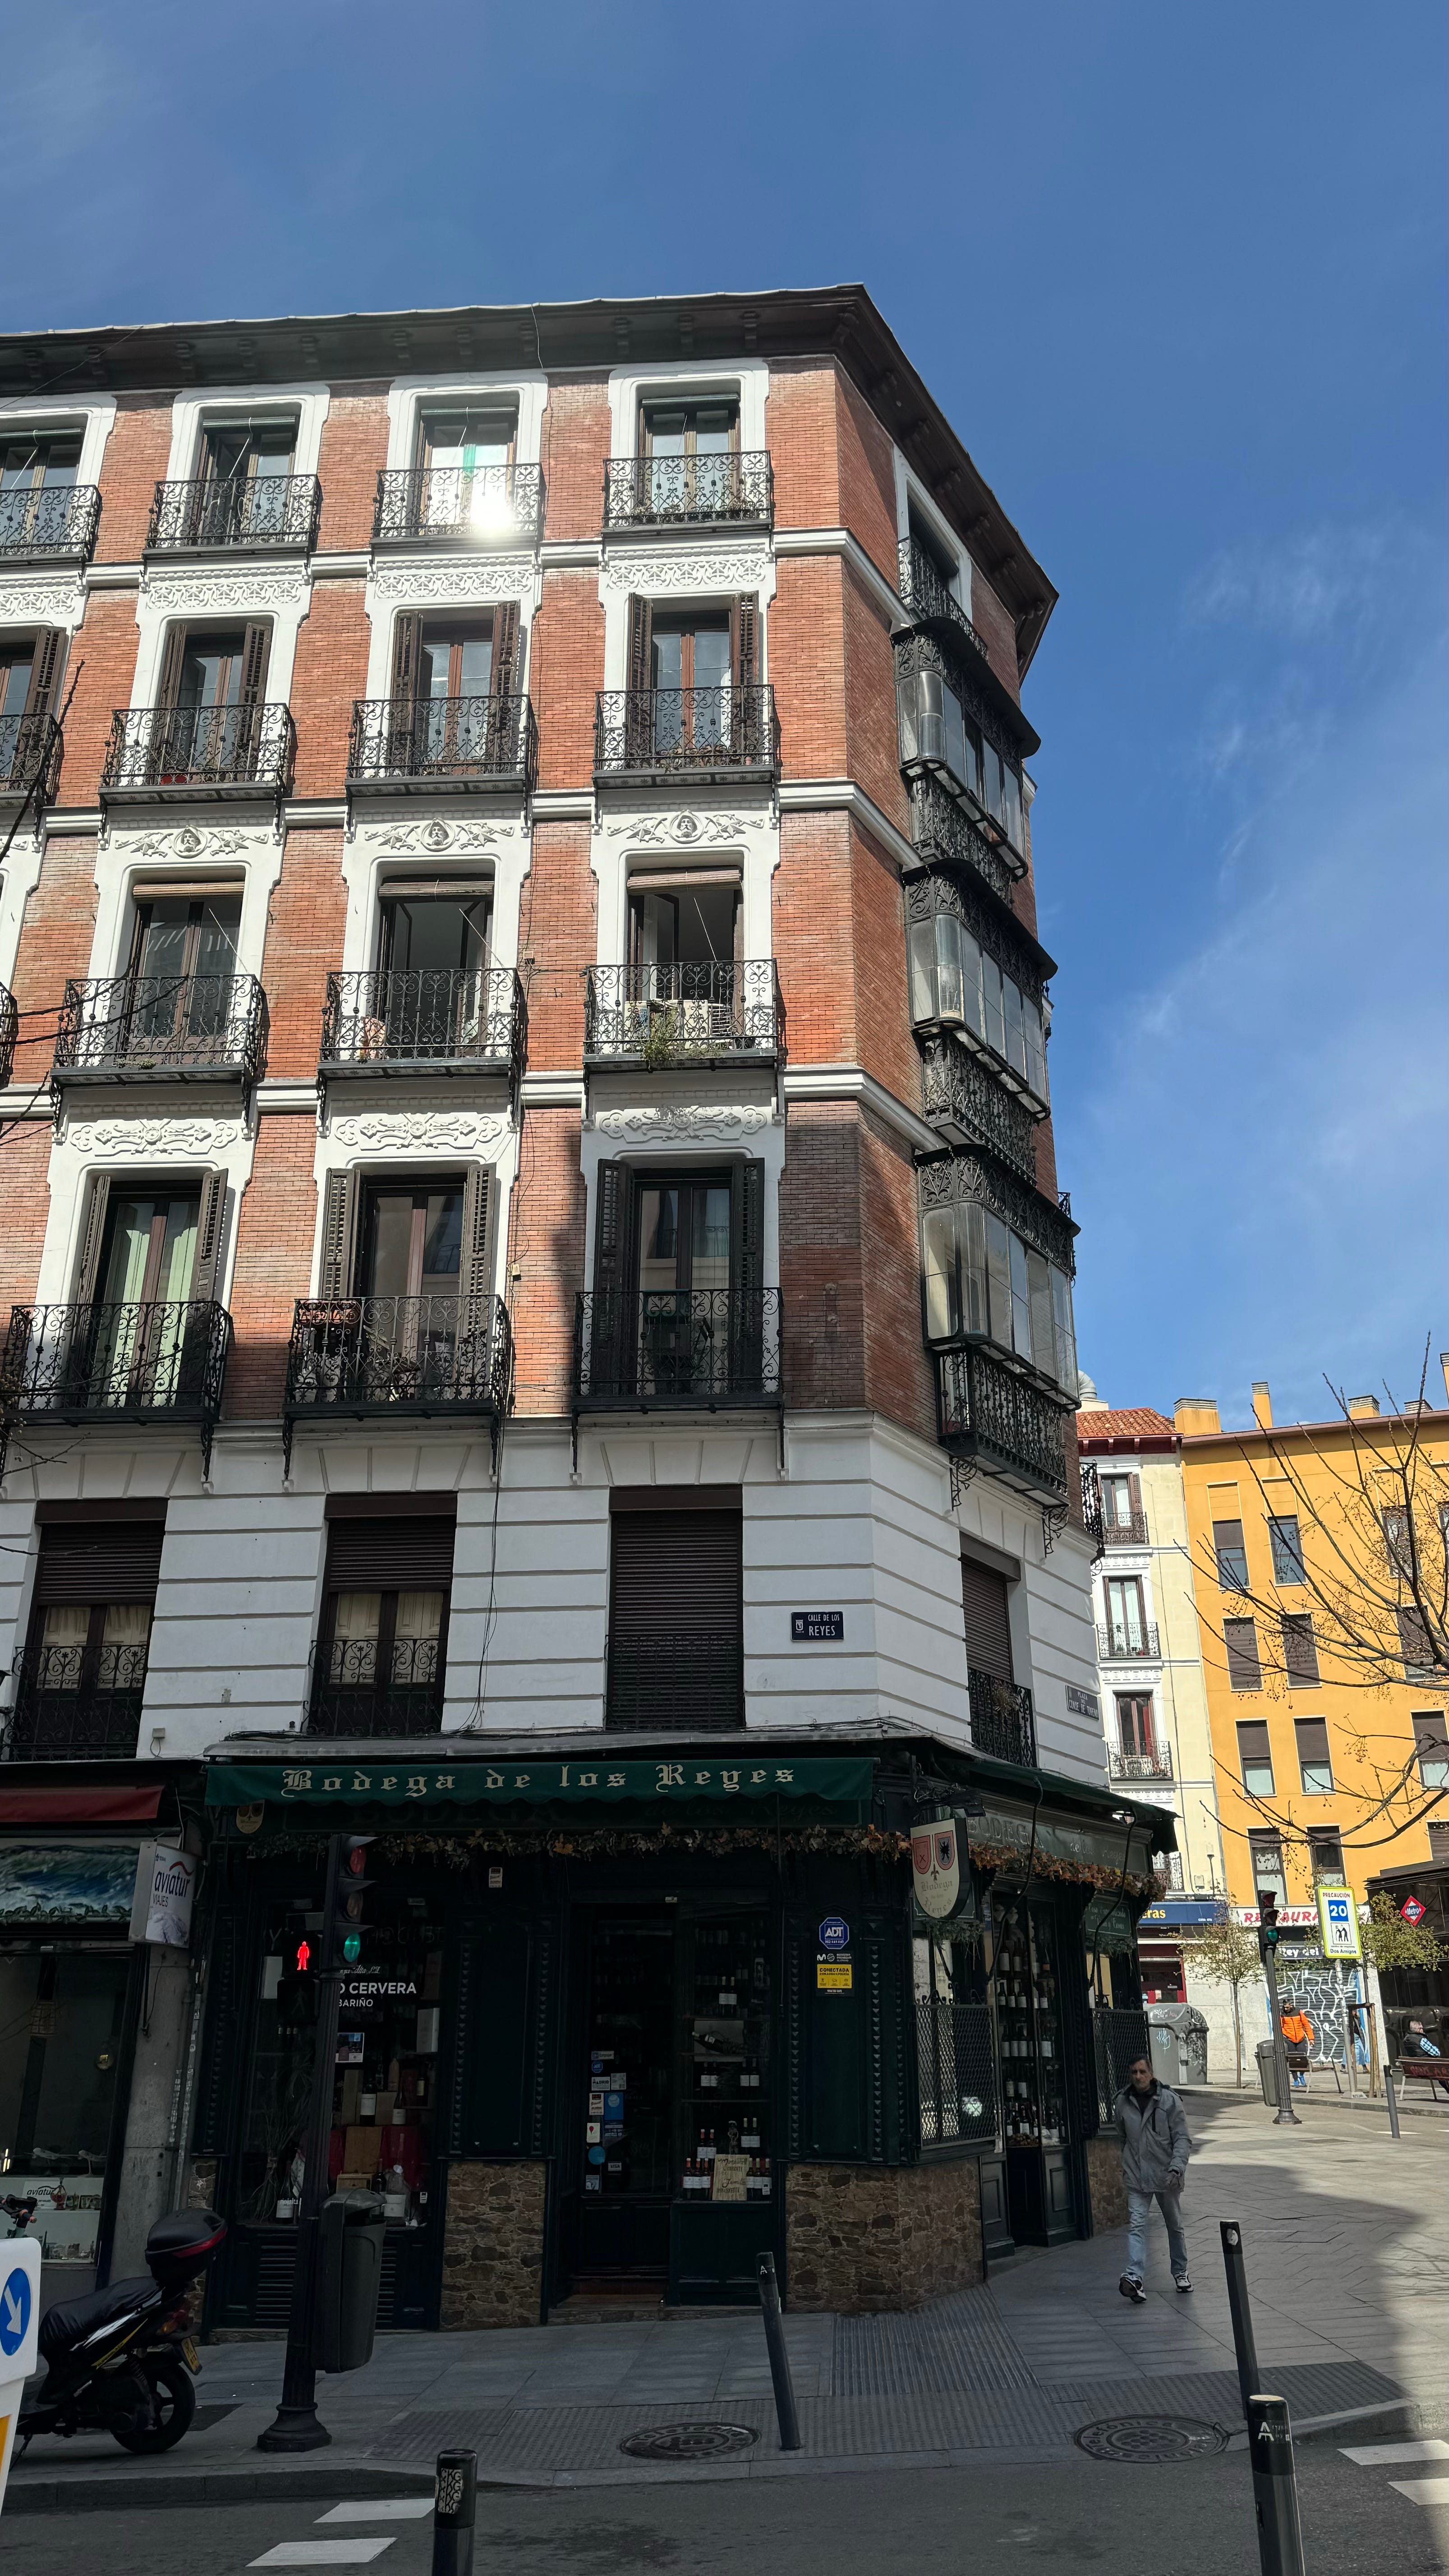
Today, let’s start with why I chose Madrid.
Preliminary Research and Decisions: A Guide
First, narrow down where you want to live specifically. Consider what you need in a city and what visas could work for you.
I studied Spanish and Italian, and I wanted to live in Europe, so my natural two choices were Spain and Italy. I’m a city person, so the main options that came to mind were Milan, Rome, Turin, Florence, Madrid, and Barcelona. I decided that Turin and Florence were too small. I don’t like Milan (what’s the point of living in Italy if you’re in Milan?), so it came down to Rome, Madrid, and Barcelona. I thought I might lean toward Italy (maybe it feels more romantic?), but I looked at my visa options, and they had fewer than Spain. I speak fluent Spanish and my Italian is just okay, so I decided it might be easier to live in a place where I feel confident in my command of the language. I think Rome is beautiful, but I understood that daily life might be more logistically challenging to live there.
Once I decided on Spain, I originally thought I wanted to move to Barcelona. People portray it as a bit cooler than Madrid, branding it as the place to be for young people. In my head, I thought that it was more like New York, and Madrid was more like Washington D.C., where I grew up. After talking to many people and researching more, I realized this was a bad analogy. Madrid is 6x bigger than Barcelona by land and has around 2x the population, and the population density makes a big difference. From talking to Barcelona natives, since it’s much more dense, they feel the encroachment of “expats” more directly.
Barcelona also raises the language question again since it’s a bilingual city. Many people prefer to speak Catalan, even if they understand Spanish. If I moved to Barcelona, I would want to learn Catalan, but that would be a whole ‘nother side quest. Practicing Spanish wasn’t the only reason for moving to Spain, but I felt that moving to a bilingual city would not be the optimal way to practice.
After deciding on the location and visa type, I found Facebook groups for other people doing the same thing. These groups were beneficial for answering specific questions that a Google search didn’t cover.
My final deciding factor was reconsidering liveability: Madrid has one of the best public transportation systems in the world. It puts the New York MTA to shame. It’s clean and efficient, and young people can ride unlimited for € 8/ month. In New York, if you take the subway daily to work, you’ll pay $136/month. Madrid’s airport is also close to the city center, making it very convenient for travel. Milan could never!
Letters from… My Terrace
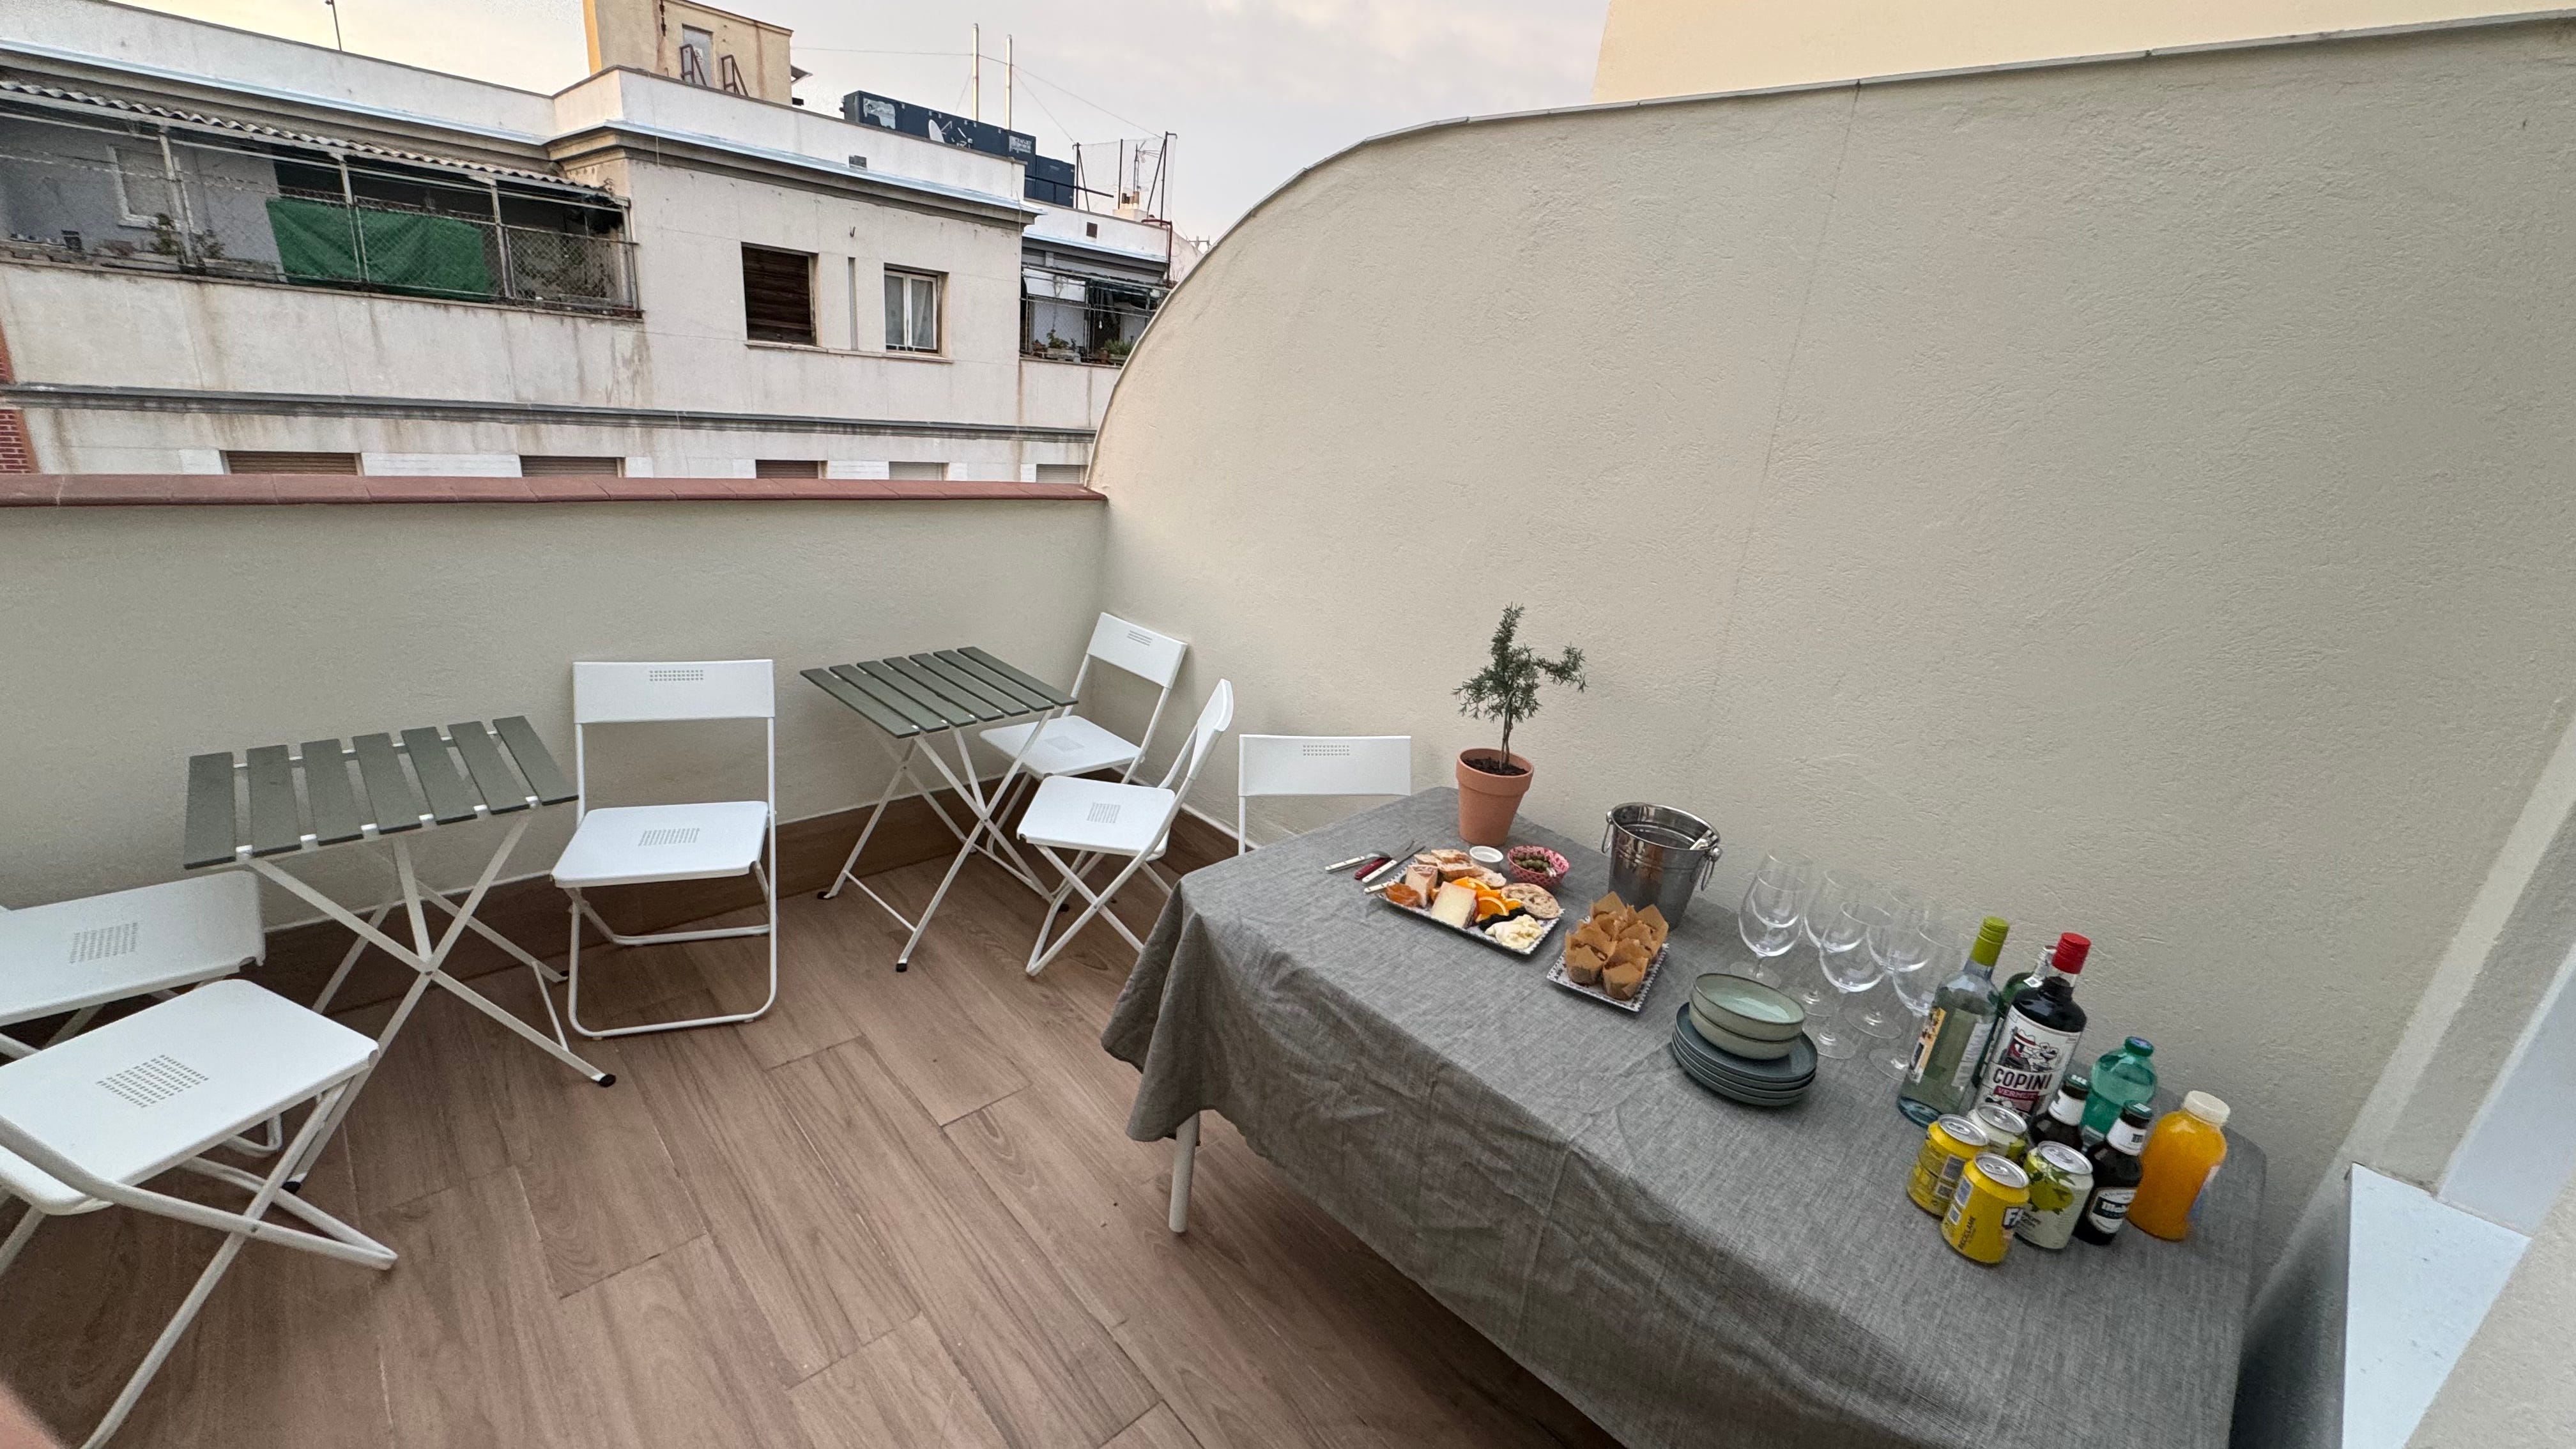
I had some family friends in town and invited them for a drink on the terrace before dinner. My terrace was really empty, but literally 5 minutes before they arrived, IKEA delivered the chairs and small tables. Out of all the things I got from IKEA for my apartment, these were the only things that didn’t require assembly. It was perfect timing (besides my mad dash to rip the plastic off and hide the evidence).
I made banana bread muffins from my cookbook, Cooking Smarter. I put chocolate in half of them. It’s surprising how much chocolate changes the flavor of banana bread. I appreciate the plain one a lot more after trying it with chocolate because you can really notice the banana flavor.
I also picked up some cheeses from local shops. The top was a young semi-firm goat cheese, the middle a cured sheep’s cheese, and the bottom a creamy cow’s milk cheese from Galicia. The baguette was from a French bakery in the area. I got the oranges at my local fruitmonger, and they were incredibly sweet.
For drinks, I set out a few options:
Sweet vermouth, commonly enjoyed on the rocks here.
Portuguese vinho verde, one of my favorite white wine varieties. It’s crisp and can have a bit of effervescence.
Mahou, one of the most common Spanish beers.
Cerveza con limón, beer mixed with lemonade, like a shandy.
Freshly squeezed orange juice, for mixing.
Lemon Fanta, it’s so much better here!
Sparkling water, for mixing!


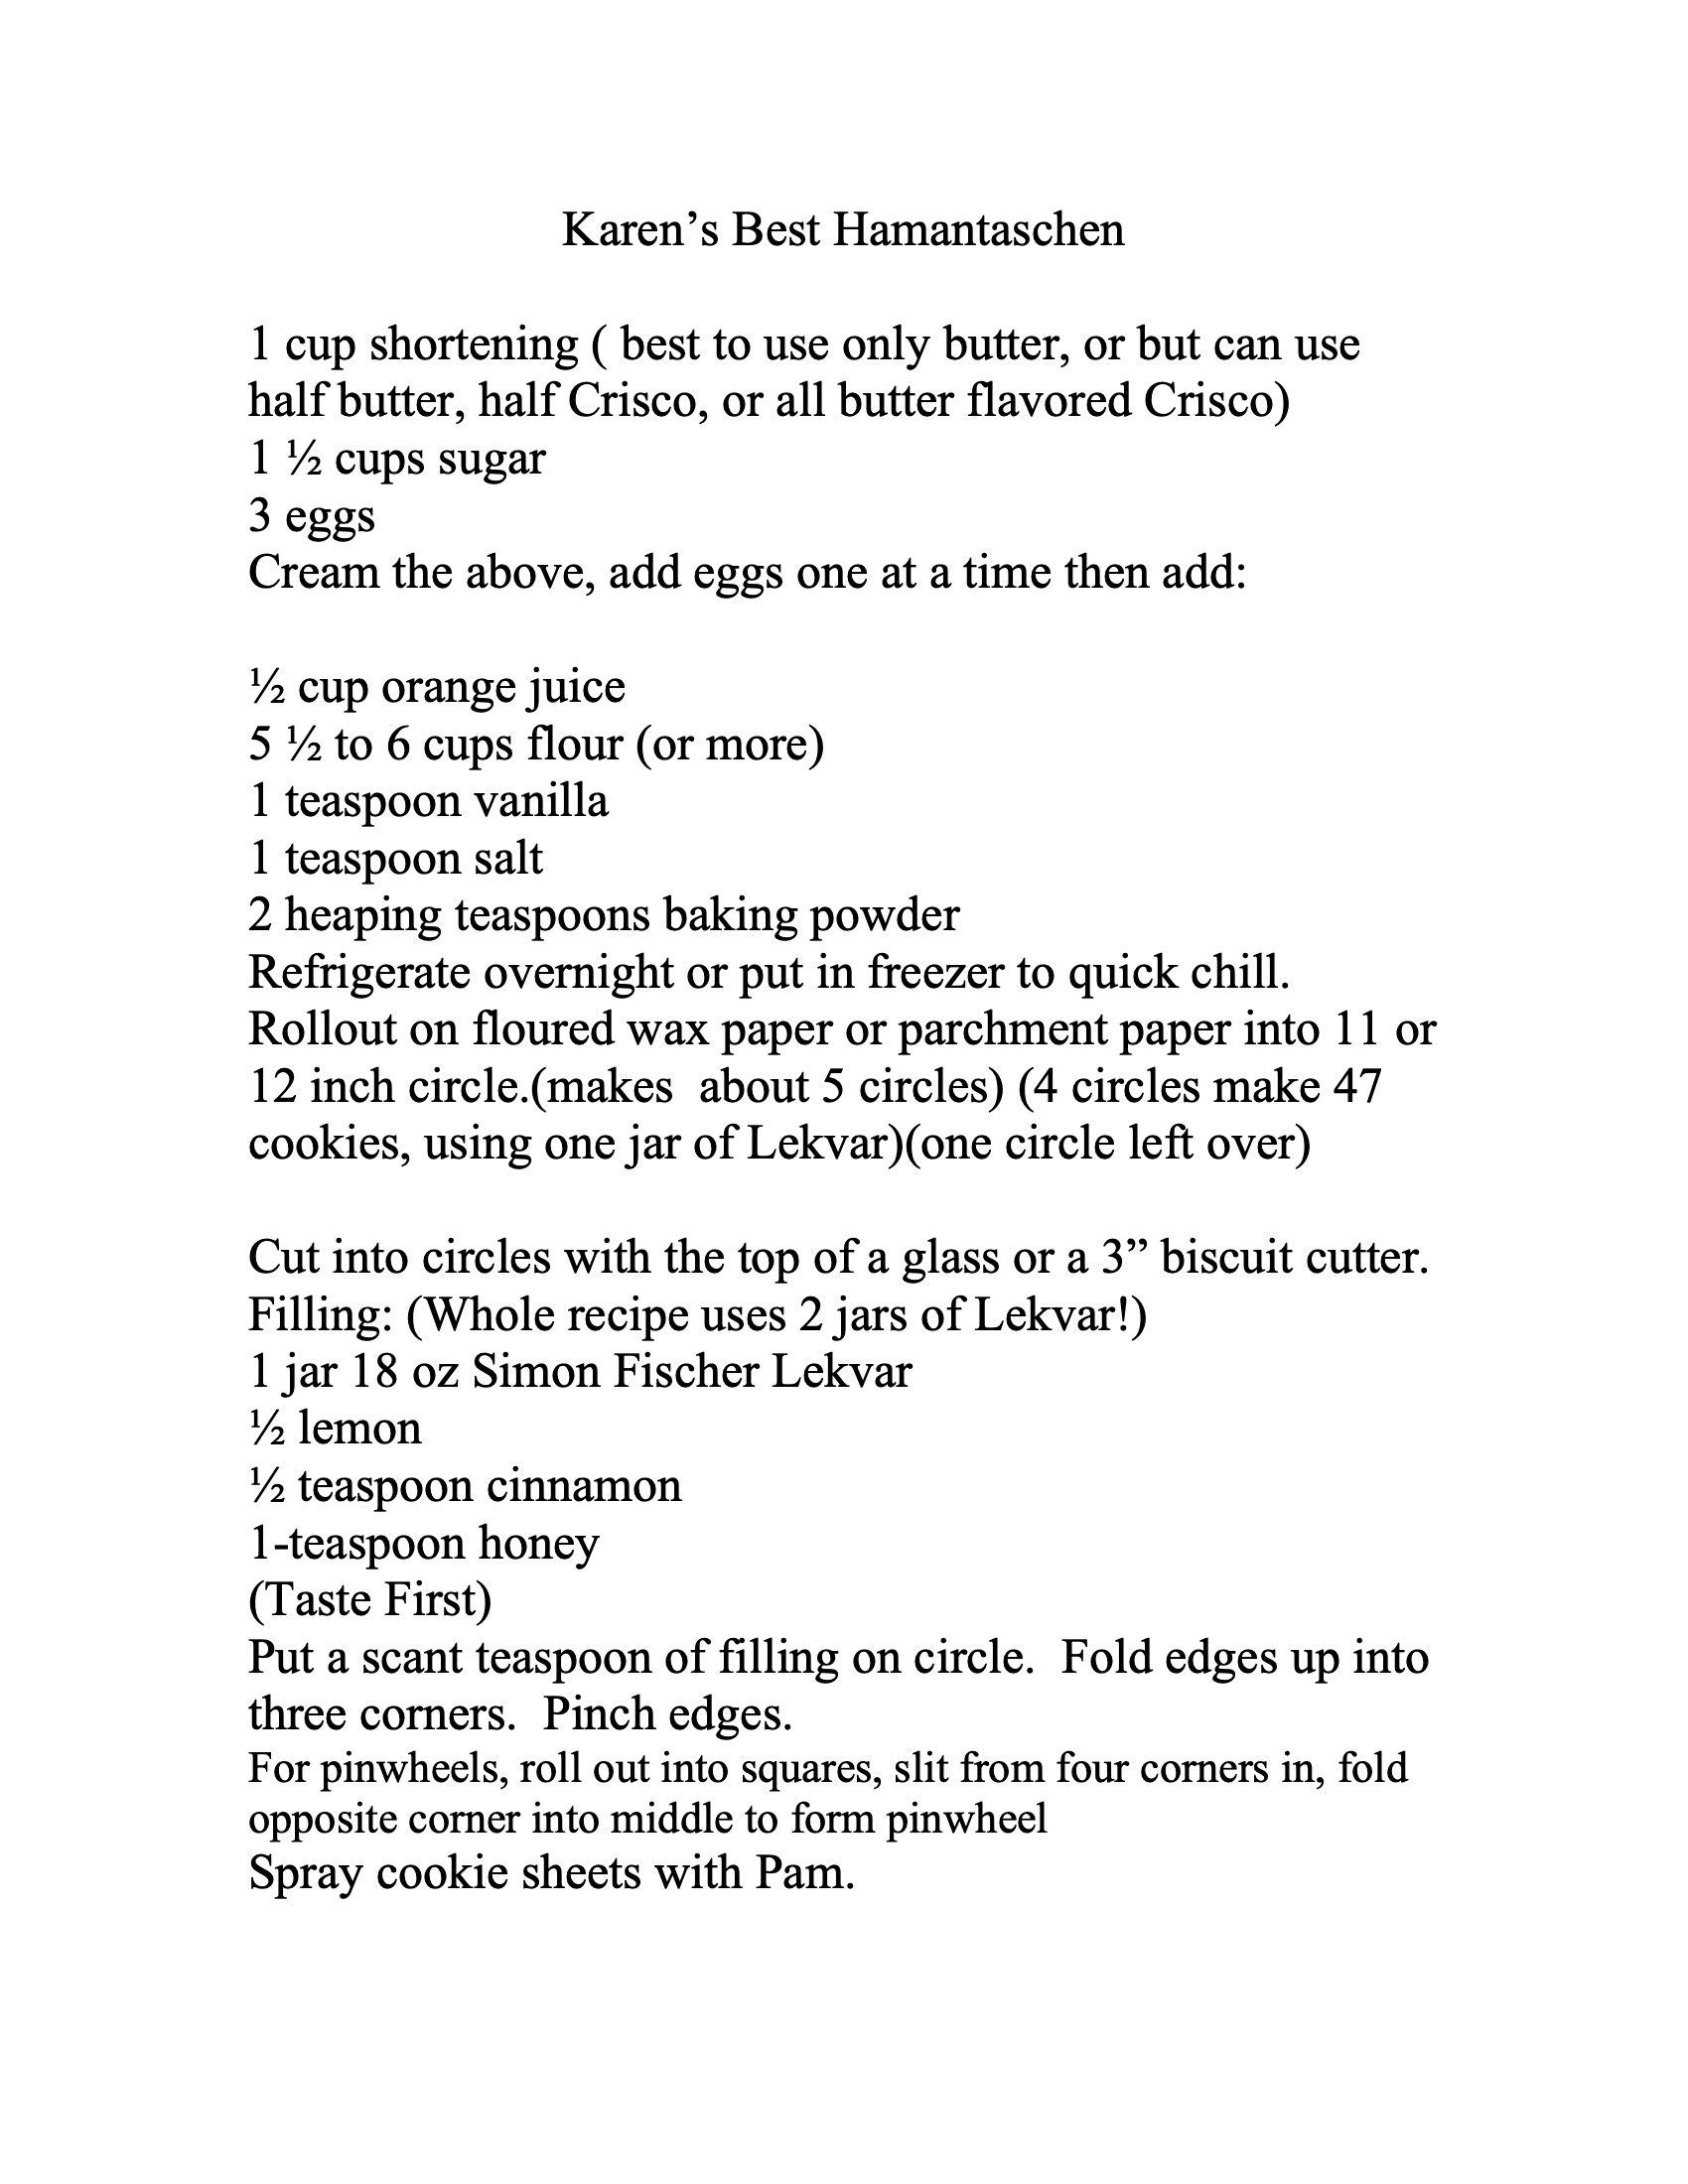
Grandma’s Recipe Box: Key Lime Pie Hamantaschen
Purim is around the corner. Whether you celebrate it or not, everyone can enjoy these treats. The cookie base is Great Grandma Jennie's recipe, but I learned it from Grandma Karen. We'll run through the original recipe in my Grandma's writing, then how I adapt it for my 2024 kitchen.

Here’s the original recipe directly from my Grandma. These hamantaschen are different than most other ones I’ve tried. It’s more like a crisp sugar cookie base instead of the typical sandy texture. I think they are much tastier than the standard kind, but I will warn you, keeping their shape super neat is a bit more difficult.
My adaptation
In my adaptation, I only use butter (because I hate margarine), and I reduced the baking powder to 2 normal tablespoons instead of two “heaping” tablespoons, which is a bit imprecise. I also skipped the eggwash and did not miss it.


Ingredients for the cookie:
1 cup/2 sticks (226g) unsalted butter at room temperature
1–1/2 cups (300g) granulated sugar
3 eggs
5–1/2 cups (685g) all purpose flour
1 tsp coarse salt (such as kosher)
2 tsp baking powder
1 tsp vanilla extract
1/2 cup (120 ml) orange juice
Key Lime Pie Filling
2 egg yolks
1 can (14oz) sweetened condensed milk
Zest from 2 limes
1/2 cup (120 ml) fresh lime juice (5-7 limes)
Other Filling Ideas:
Good quality jam (I like apricot or raspberry)
Homemade Apple Pie Filling (make it in 5 minutes by sautéeing adiced apple with 1/2 cup brown sugar, 1/2 stick of butter, and 1 tsp cinnamon)
Nutella
Prune Levkar (Mix 1 jar with the juice of 1/2 a lemon, 1/2 tsp cinnamon, 1 tsp honey)
Make the Dough:
Cream the butter and sugar in a large bowl of a stand mixer on medium high speed until it is light and fluffy.
Add the eggs one at a time, beating well and scraping after each incorporation.
Whisk the flour, baking powder, and salt together in a separate, large bowl.
Add half the flour mixture to the butter and sugar mixture, and mix on low speed to combine.
Add in the orange juice and vanilla on low speed.
Add in the remaining flour mixture and mix on low speed to combine.
Divide the dough in two and wrap in plastic wrap.
Freeze for 30 minutes or refrigerate for several hours.
Making the key lime filling (if that’s the flavor you’re making):
Simply mix the egg yolks, sweetened condensed milk, lime zest, and lime juice until combined.
Shaping:
Preheat the oven to 375° F.
Roll out a quarter of the dough between two sheets of wax paper to between 1/8" and 1/4" (this method works by far the best).
Use an upside-down cup to cut circles out of the dough.
If at any point the dough becomes too soft to easily work with, return to the freezer for 5 minutes.
Lift the circles carefully onto a silpat or baking paper–lined cookie sheet.
Depending on the size of your circles, spoon between 1/2 tsp and 1 tsp
of filling in the center of each circle.
Fold three sides of the circle in to make a triangle shape, and pinch the
edges.
Freeze the shaped hamentaschen 10 minutes before baking (this helps
them keep their shape).
Re-roll scraps and repeat to make more.
Any leftover dough can be frozen for several months.
Baking:
Bake one tray at a time for 15 minutes at 375° F.
Let cool on a wire rack.
All my substack content will be unlocked and free for the two weeks, then some recipes, discussions and guides will be for paying subscribers only. Don’t worry, a monthly subscription costs less than a latte. A big chunk of content here will stay unlocked, but the juicy secrets are going to be behind that sweet, sweet little paywall. I appreciate your support in advance, and it’ll be worth the five bucks!
xx, jer!
As a young person who has lived in Rome and spent extensive time in Madrid - I can say that you made the best choice when it comes down to the ultimate convenience of public transport hahaha
Loved reading about how you came to this decision! Madrid is such an epic city. great choice. and beautiful terrace spread.